// Project
MagPieCam
A smart camera system that enables users to create smart notifications in plain English using object-tracking and zero-shot classification with a vision language model.
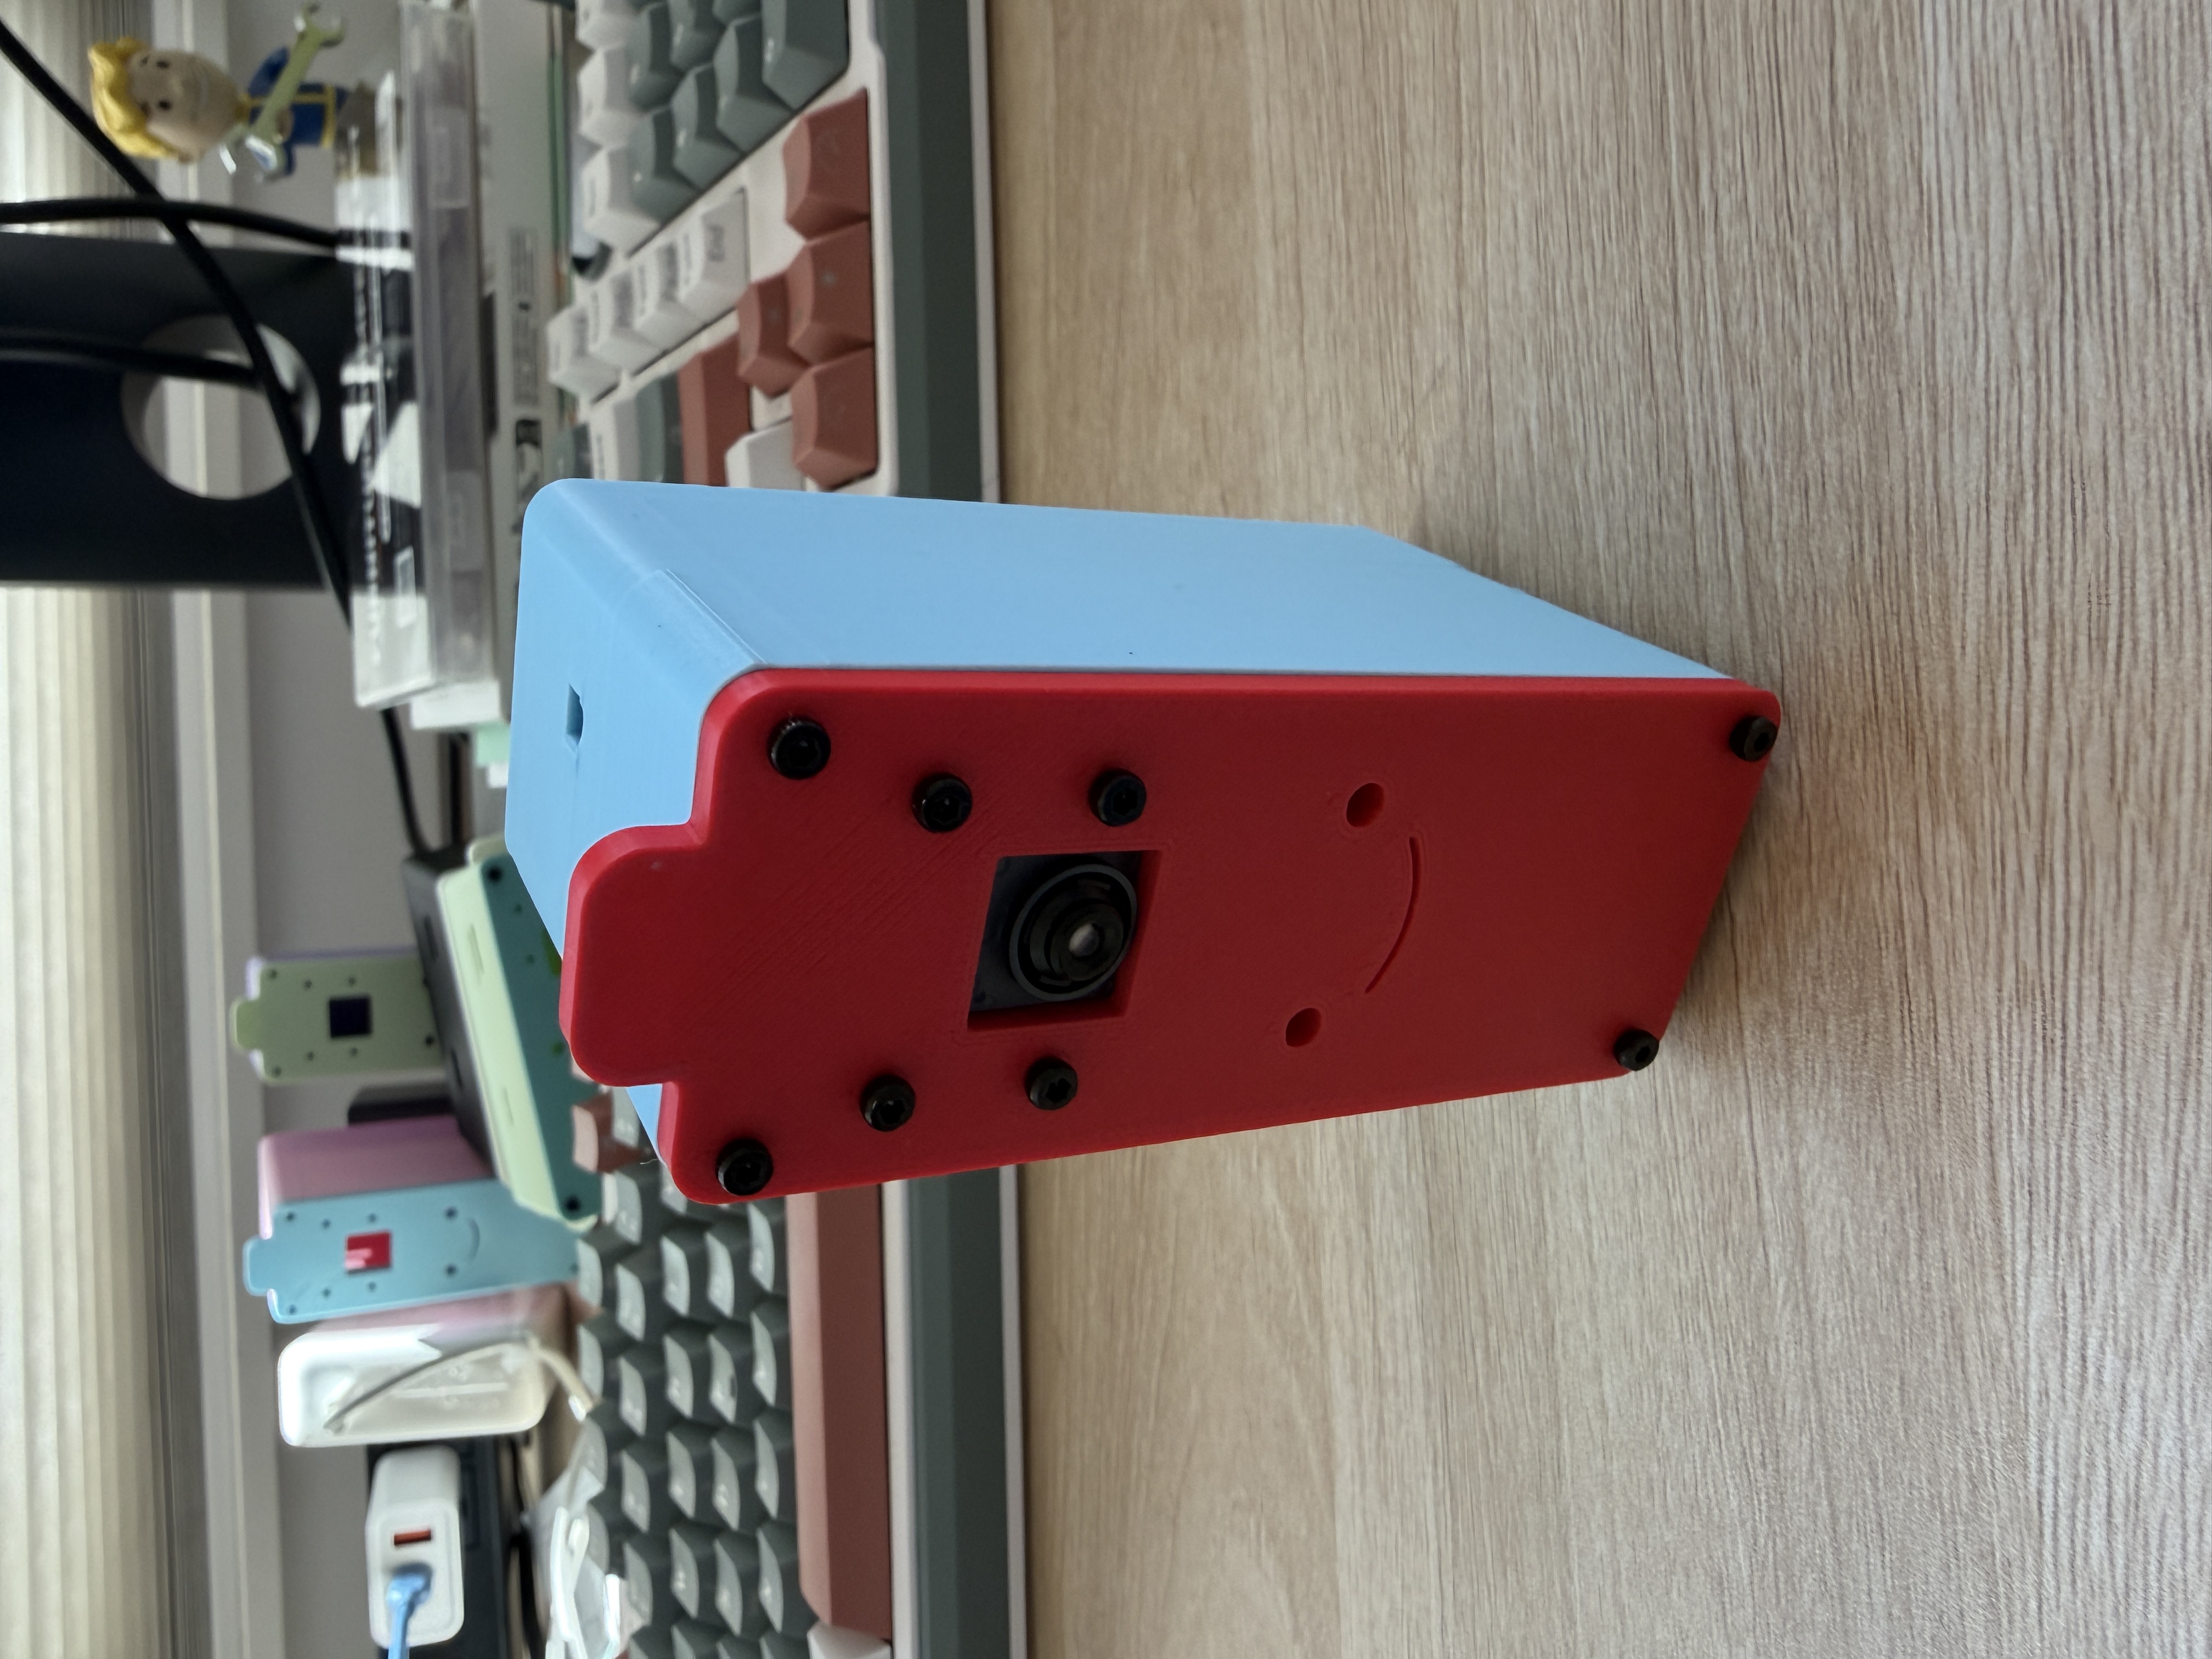
What is MagPieCam
MagPieCam is a smart camera that lets users set smart notifications using rules they create in natural language. A rule can be "Tell me when a package is delivered" for example. The camera uses an object tracker (ByteTrack) to recognize moving objects and then sends images to the rules engine which uses the Gemini API to decides if the image should trigger a push-notification to the iOS app. The iOS app is built using swiftUI, and the camera is built using a Raspberry Pi Zero 2W and the Raspberry Pi AI Camera. On this page I will walk through the architecture of the system and some of the key parts of building it.
Key Features
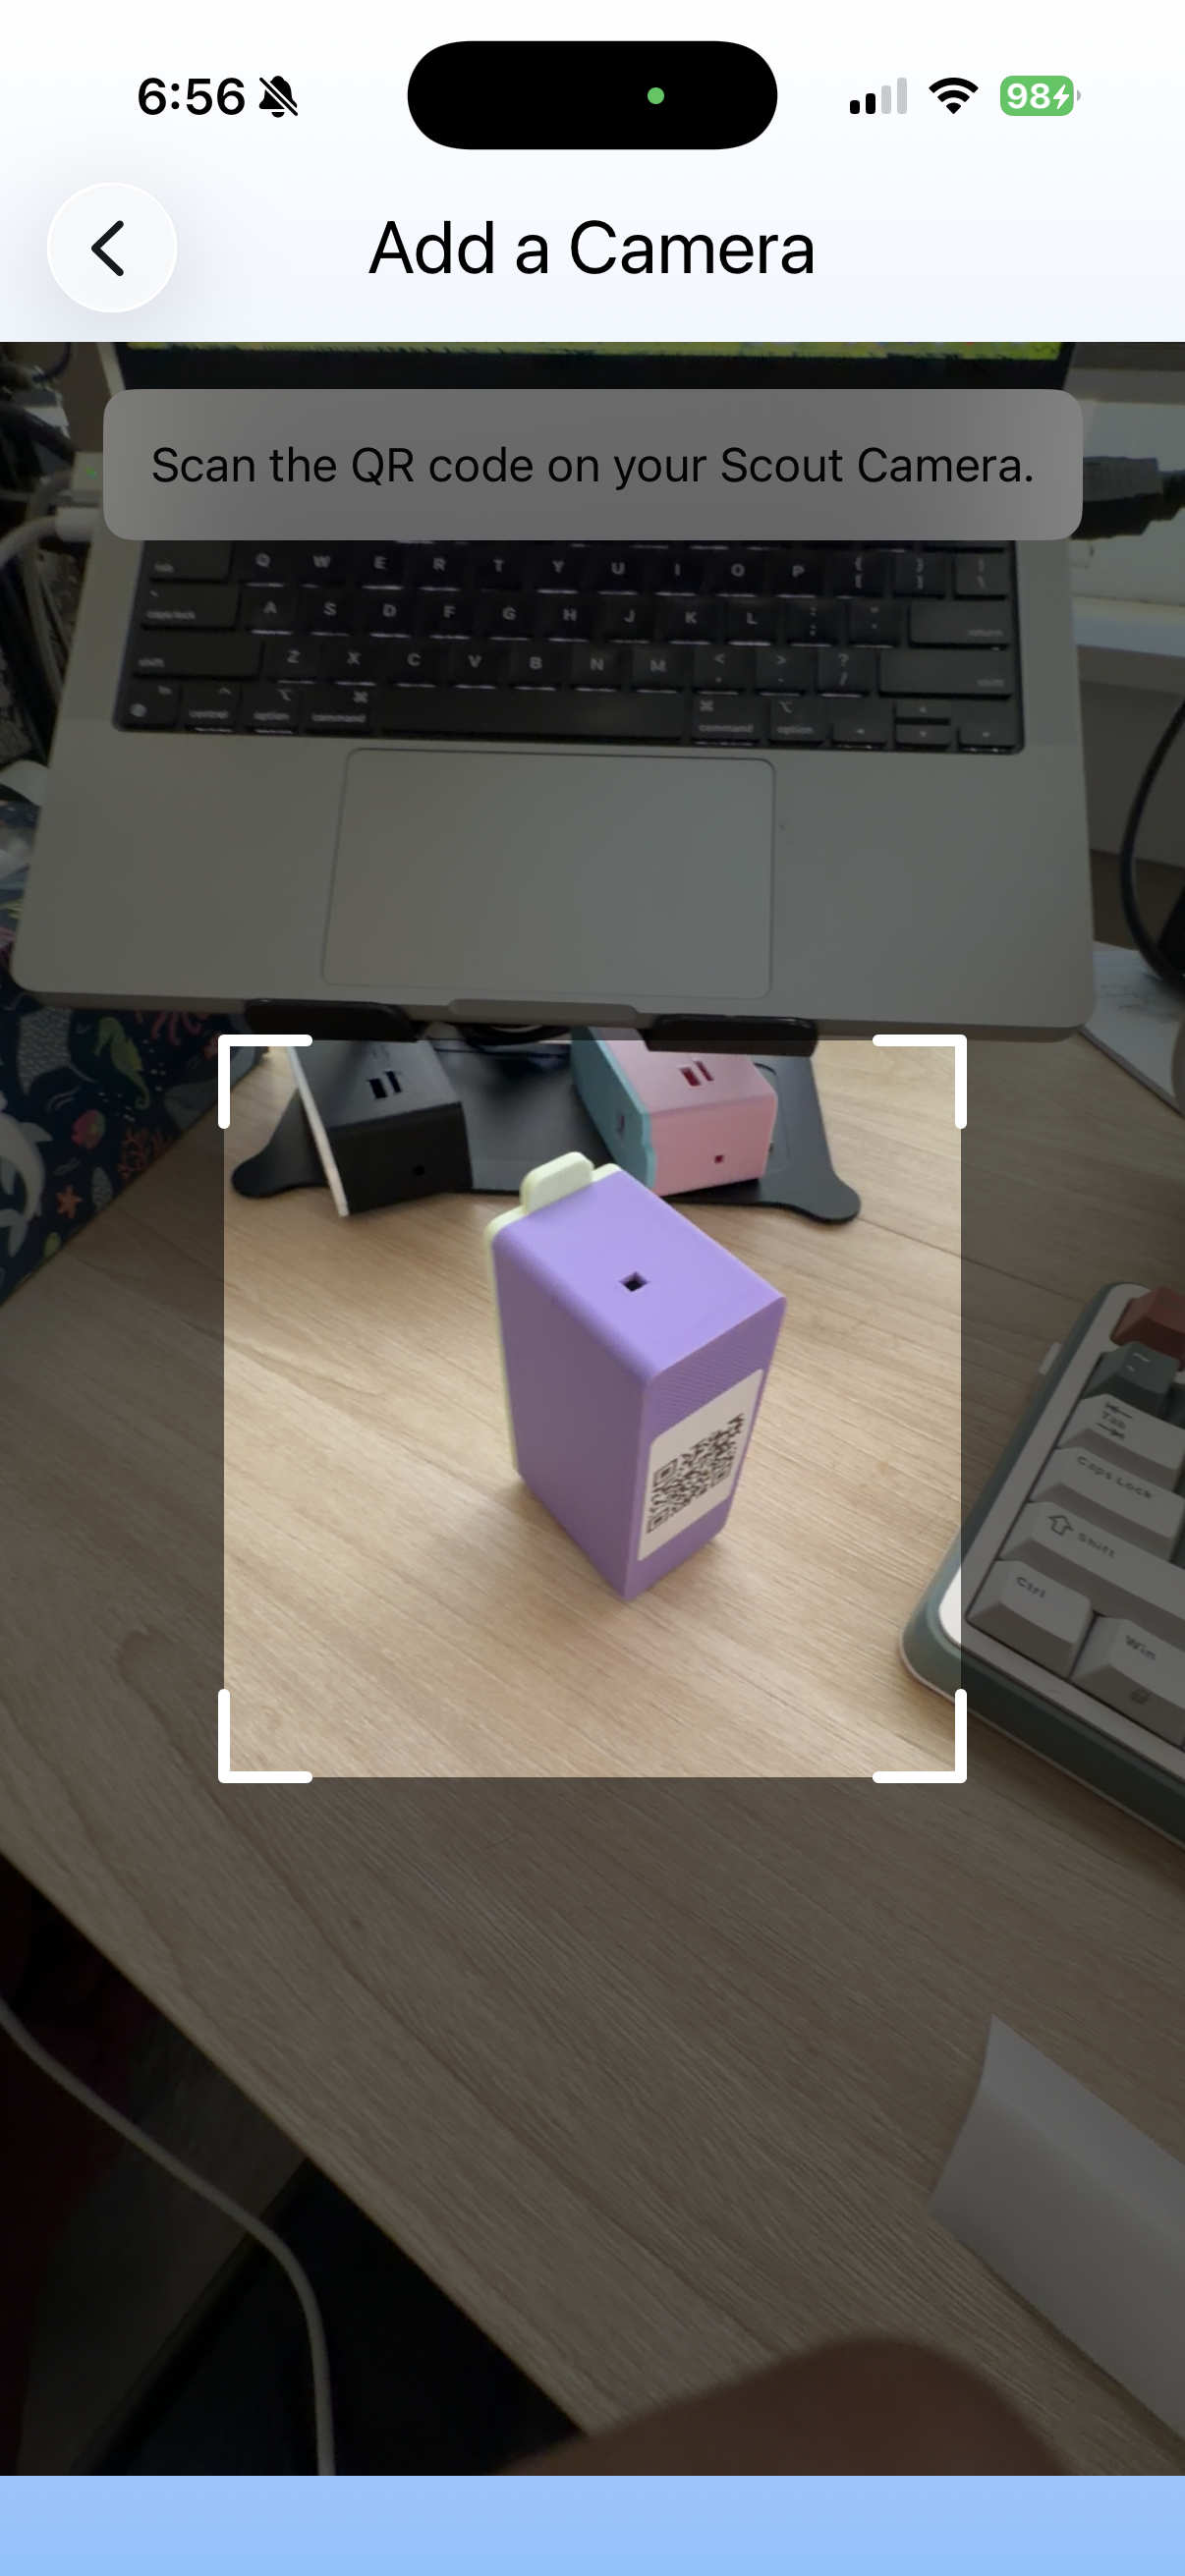
- Users can add new cameras to their account seamlessly via a qr code
- Users can stream live video from the camera at 30fps
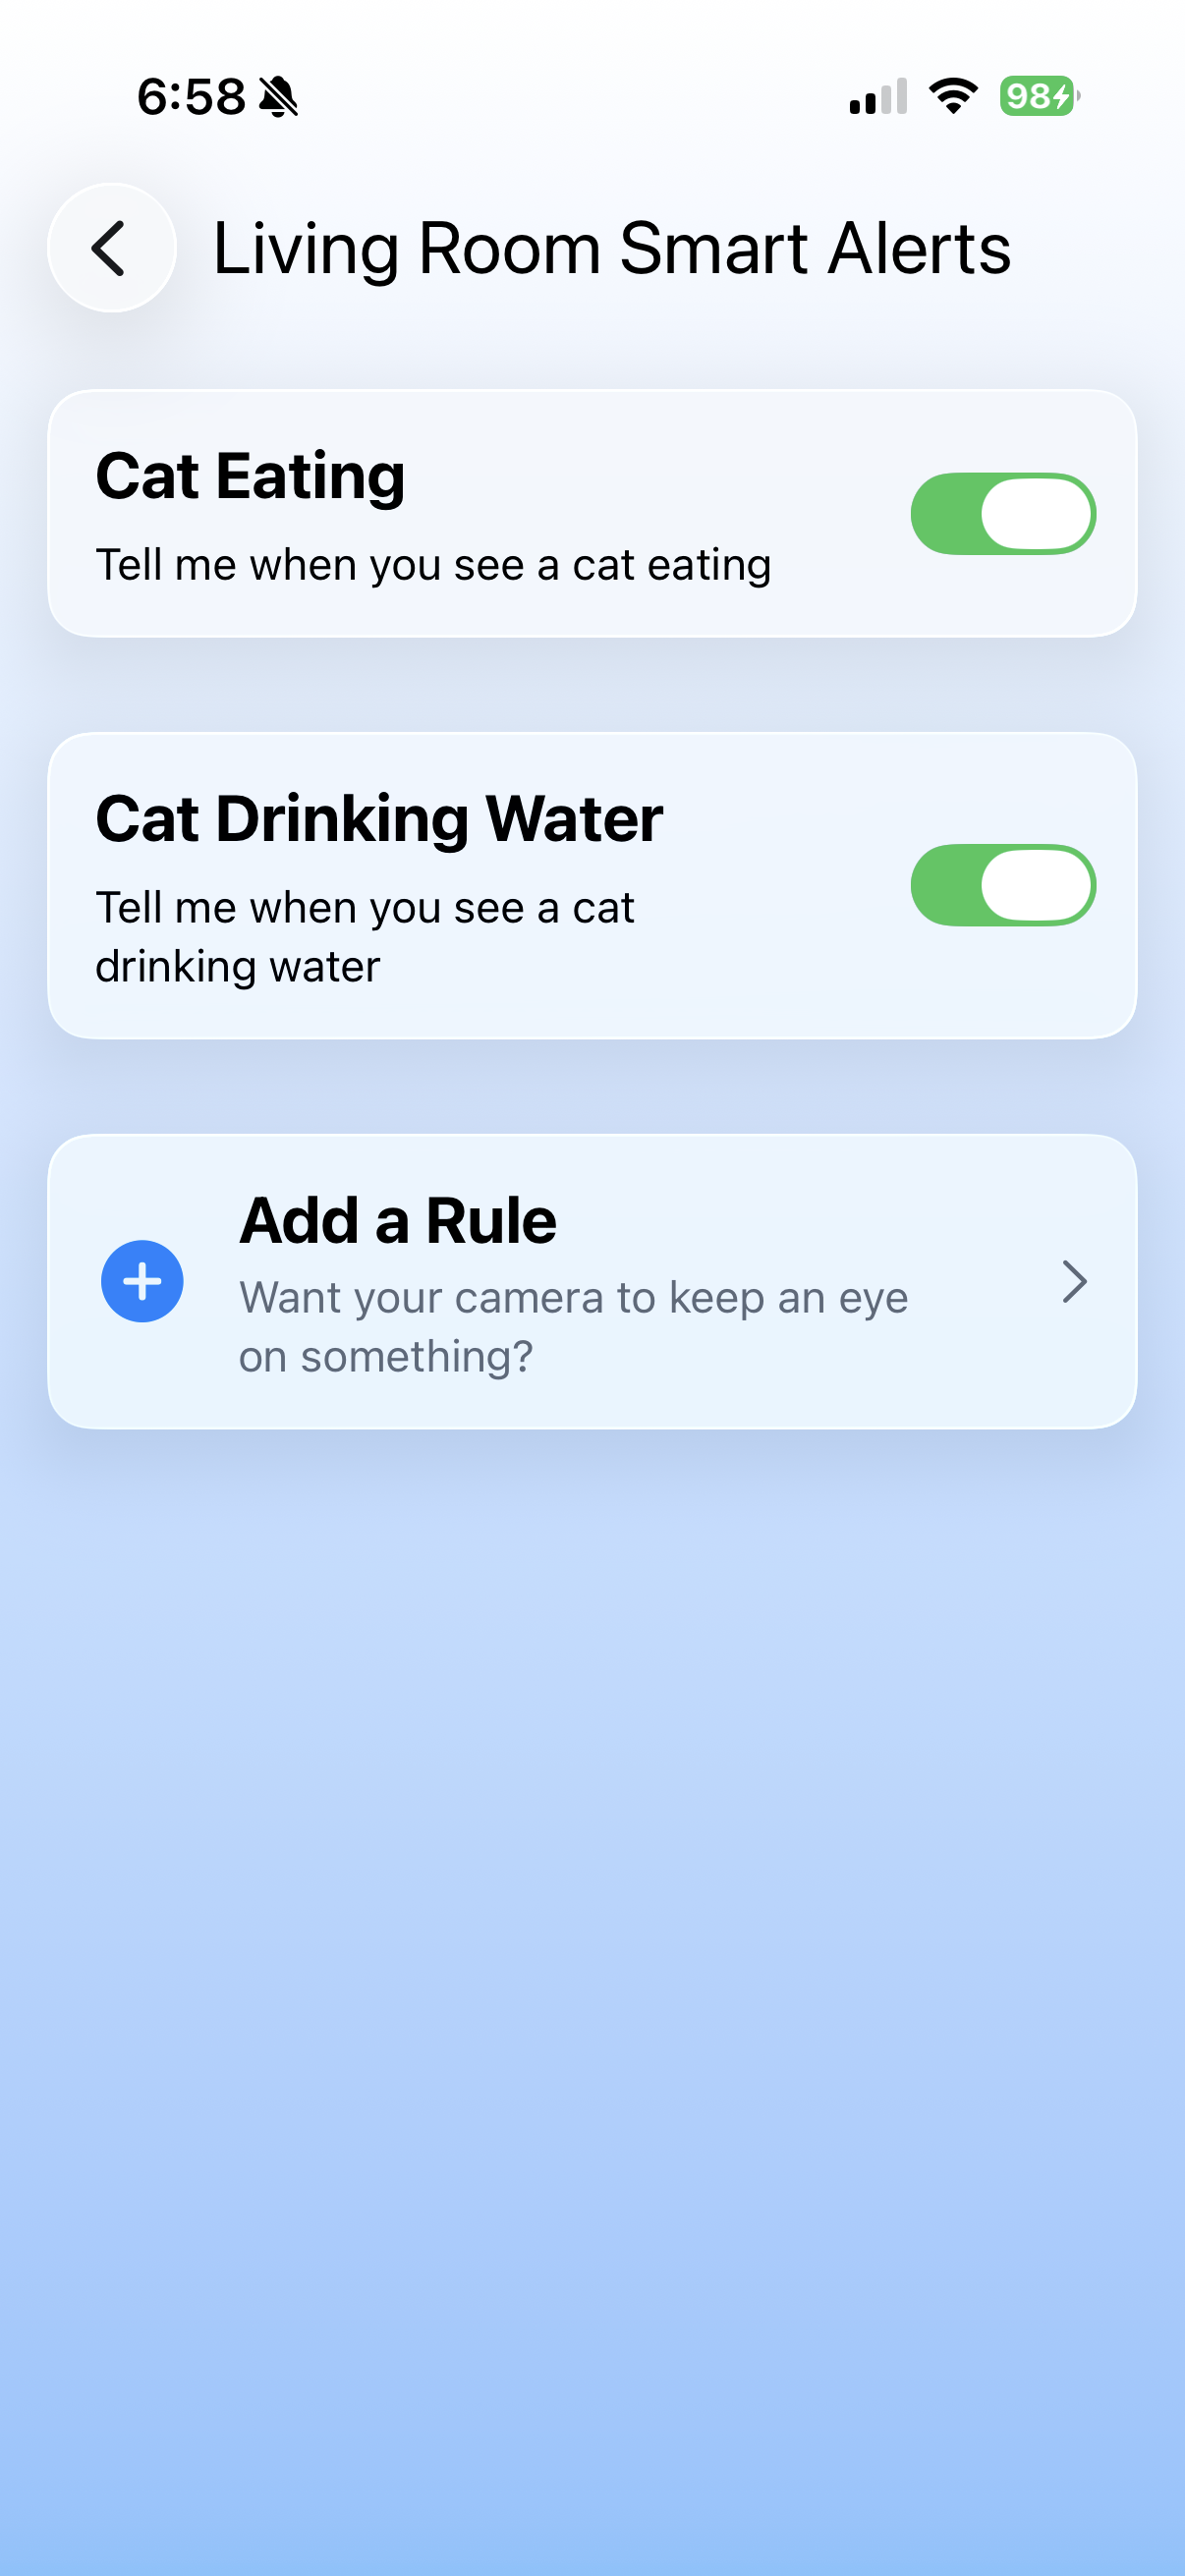
- Users can add rules for smart notifications using natural language
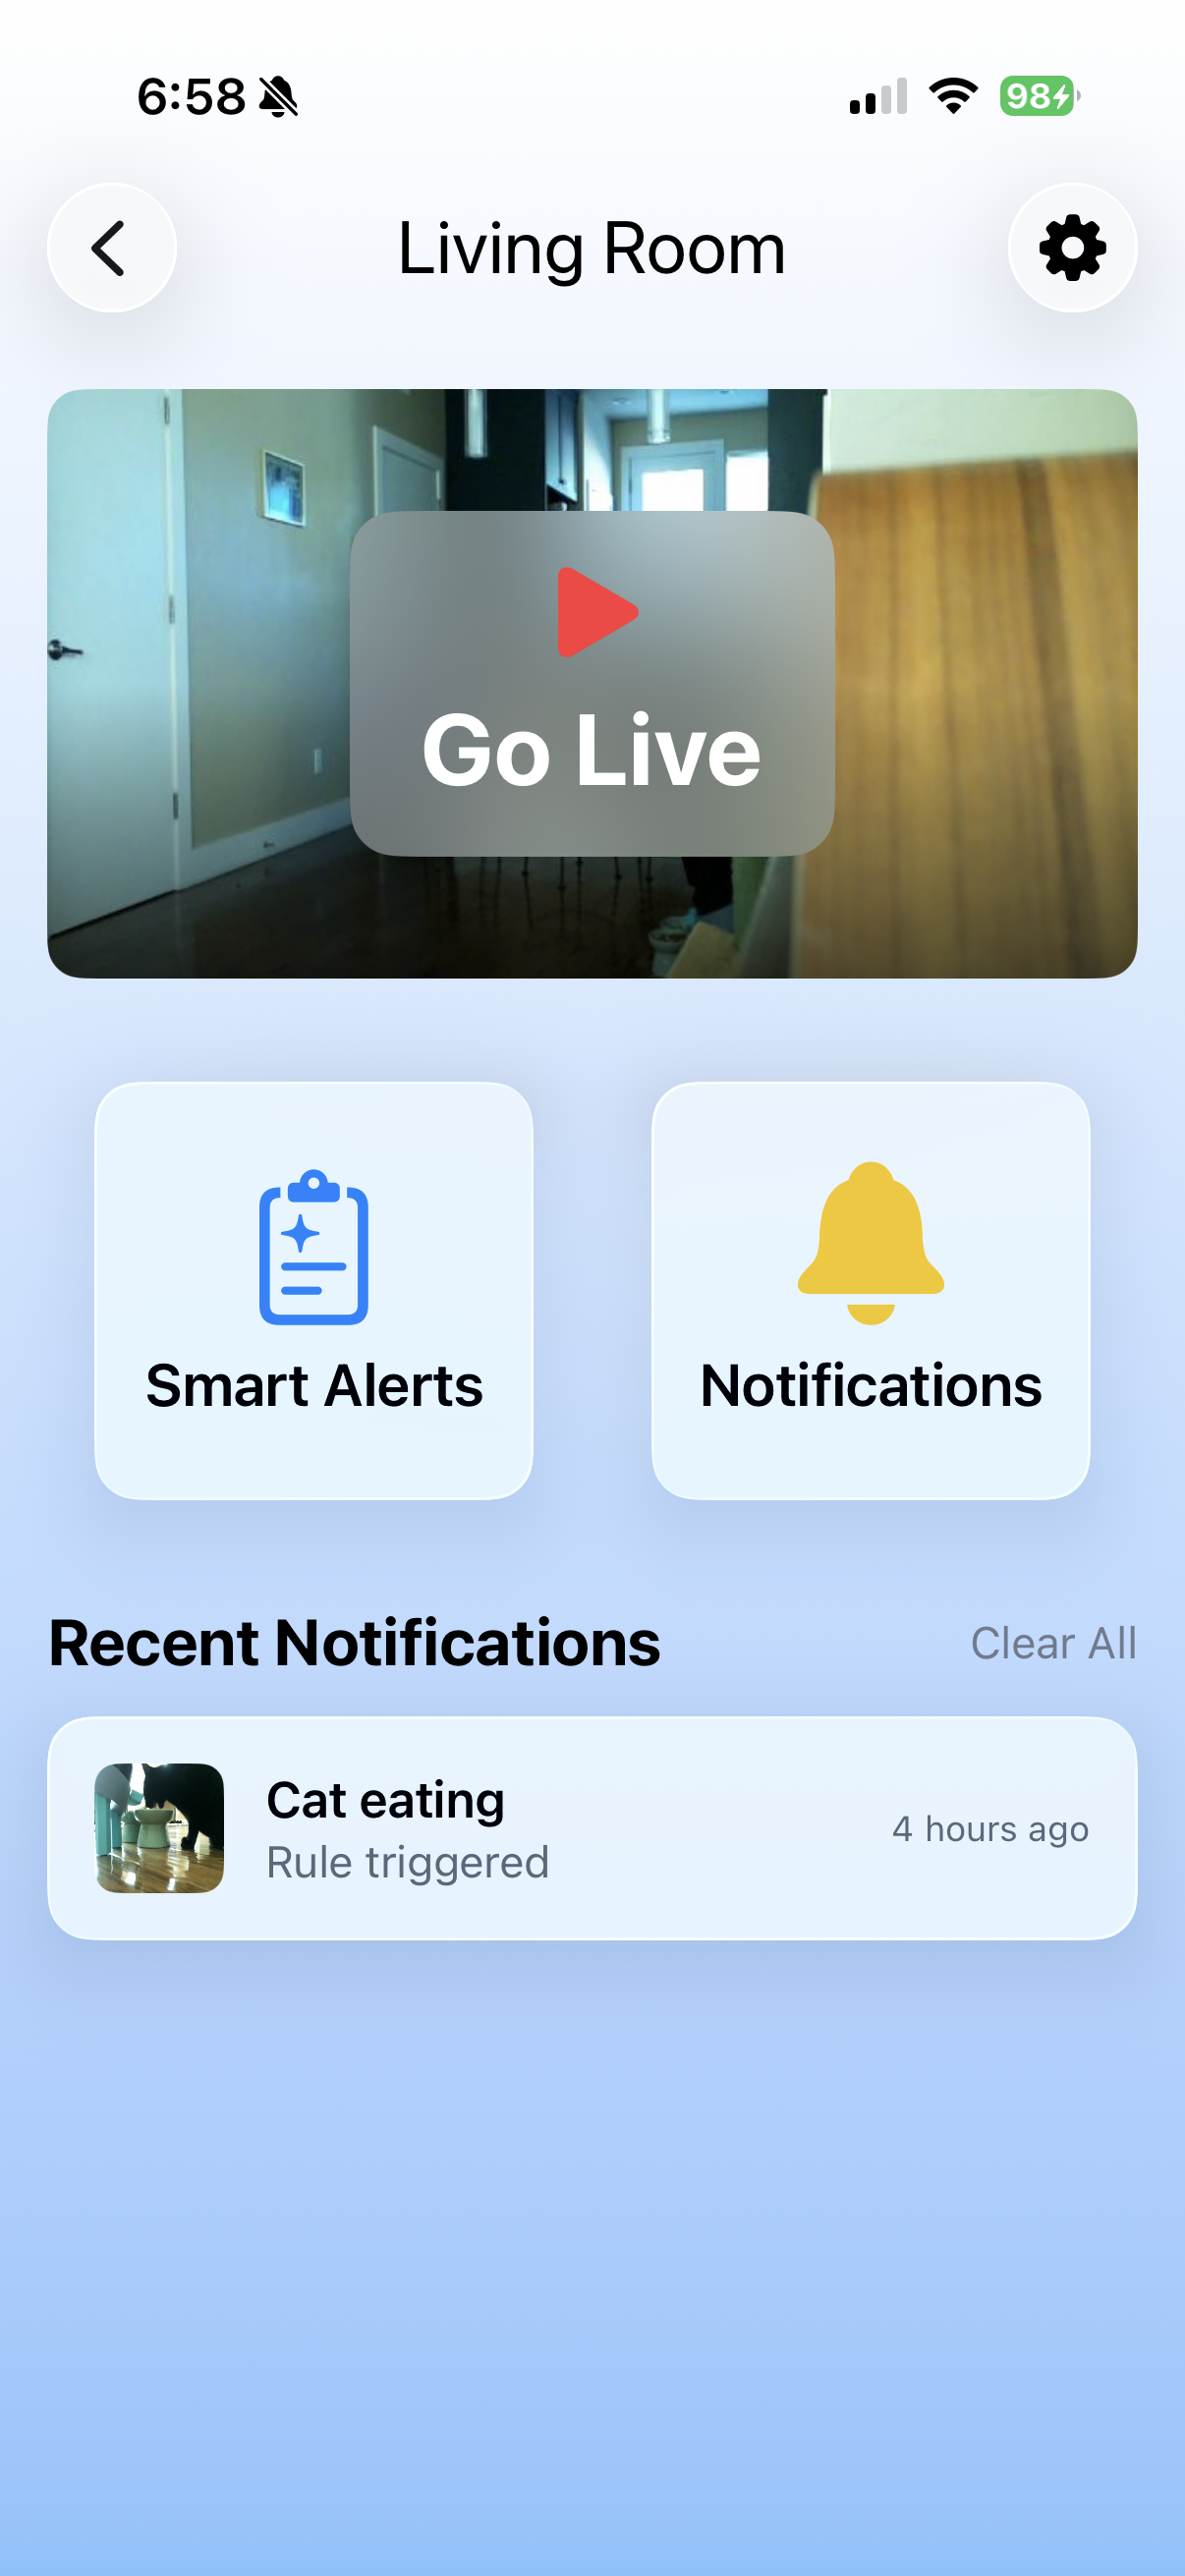
- Each notifications includes a 20 second video clip that includes the 10 seconds leading up to the event.
Demo
Adding a camera by QR code, writing a rule in plain English, and receiving the notification it triggers.
App Screenshots
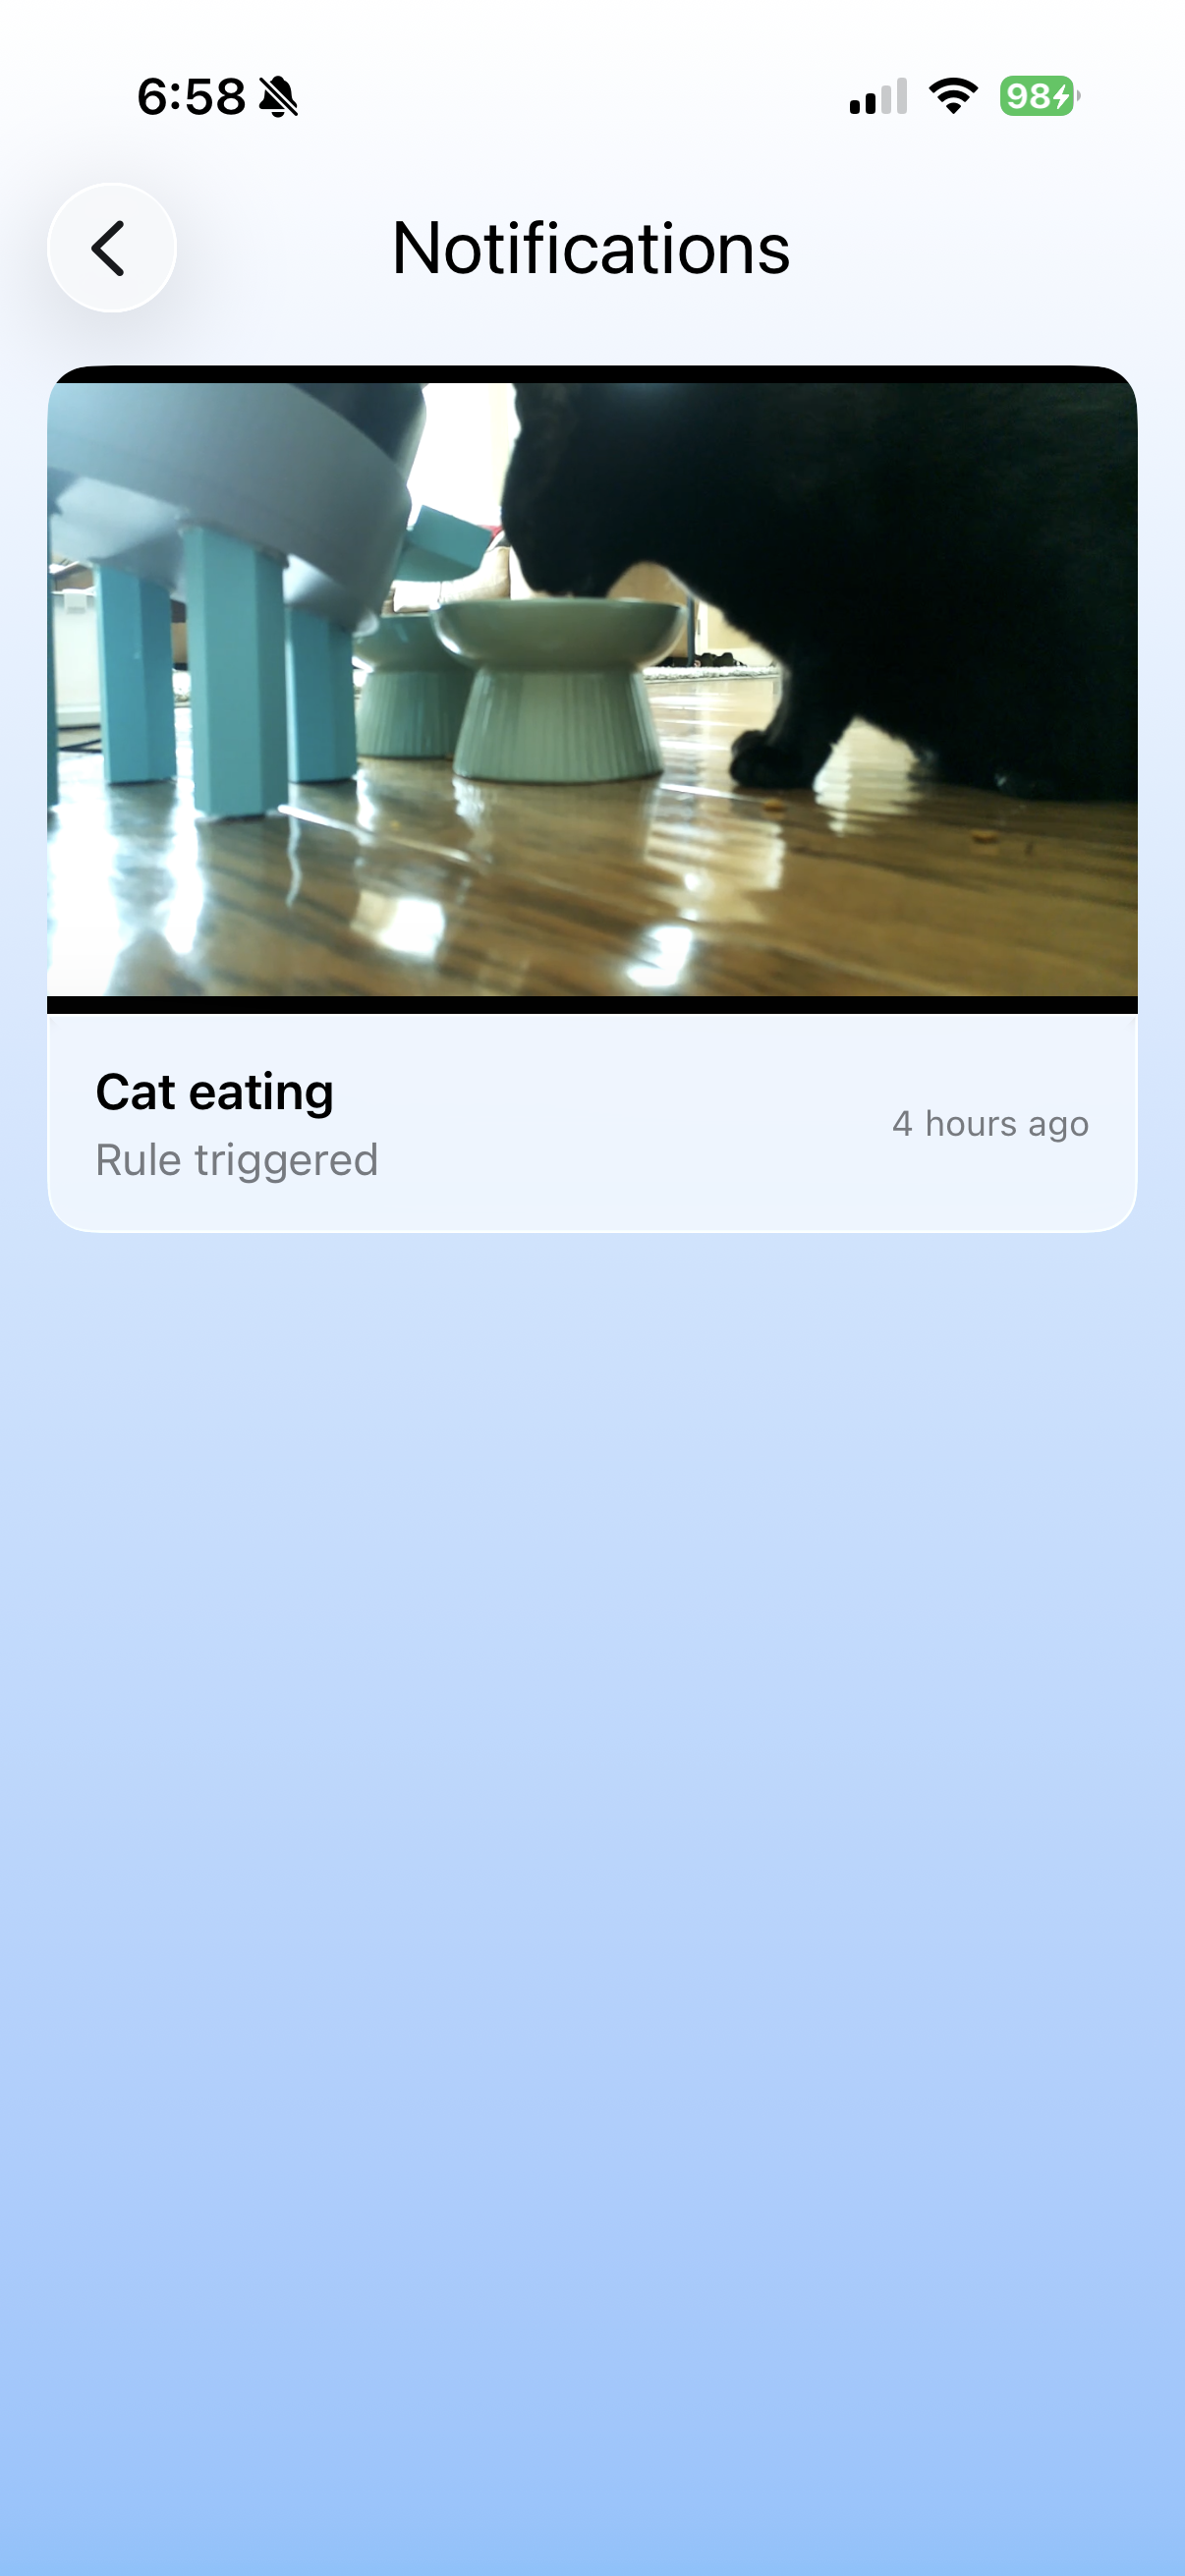
Why I Built This
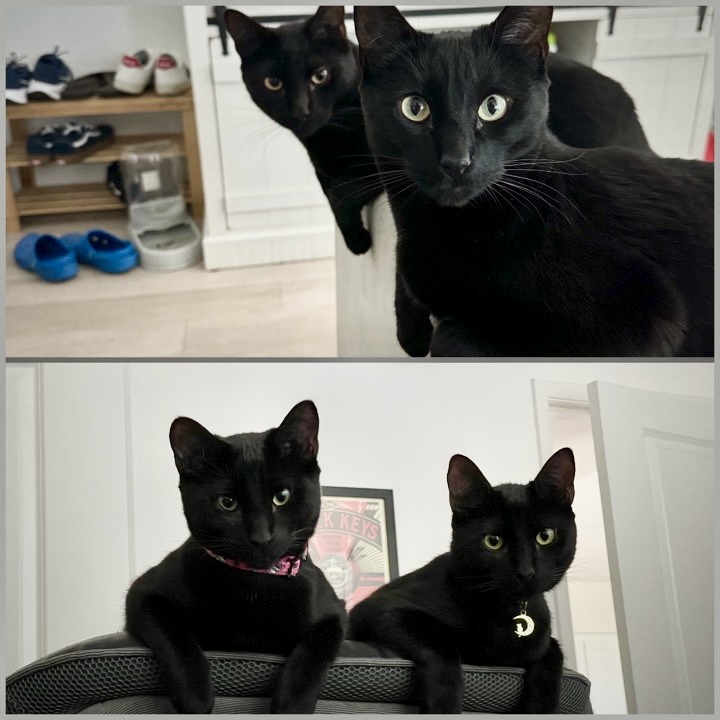
I wanted to build a system that is centered around an AI model, does something useful, and is built for production. Not just a dataset and a model with performance metrics, but a full system in the cloud that works and scales. I also have two cats at home named Zia and Luna! They are 3 years old and very curious, so I need to keep an eye on them sometimes. Luna for example, has some health problems, and so sometimes I need to track when she is eating or using the bathroom. So I tried setting up a Ring cam near their litter box or food bowls for example. But I get many notifications for events that are not what I am looking for. For example, every time a cat or person walks by, I get an event. Additionally my girlfriend and I live in an area that has a decent amount of foot traffic. Similarly we tend to get a lot of notifications that are just people walking by. Ring now has unusual event detection but the user doesn't determine what is unusual. So I built MagPieCam.
Note: I used Claude Code throughout this project. I wanted to build a scalable, reliable AI system end to end, but you can't be an expert in everything, so I focused on the AI Engineering, the REST API and AWS with Terraform, and delegated the majority of the iOS and Edge development to Claude code. I talk more about my workflow below.
System Architecture
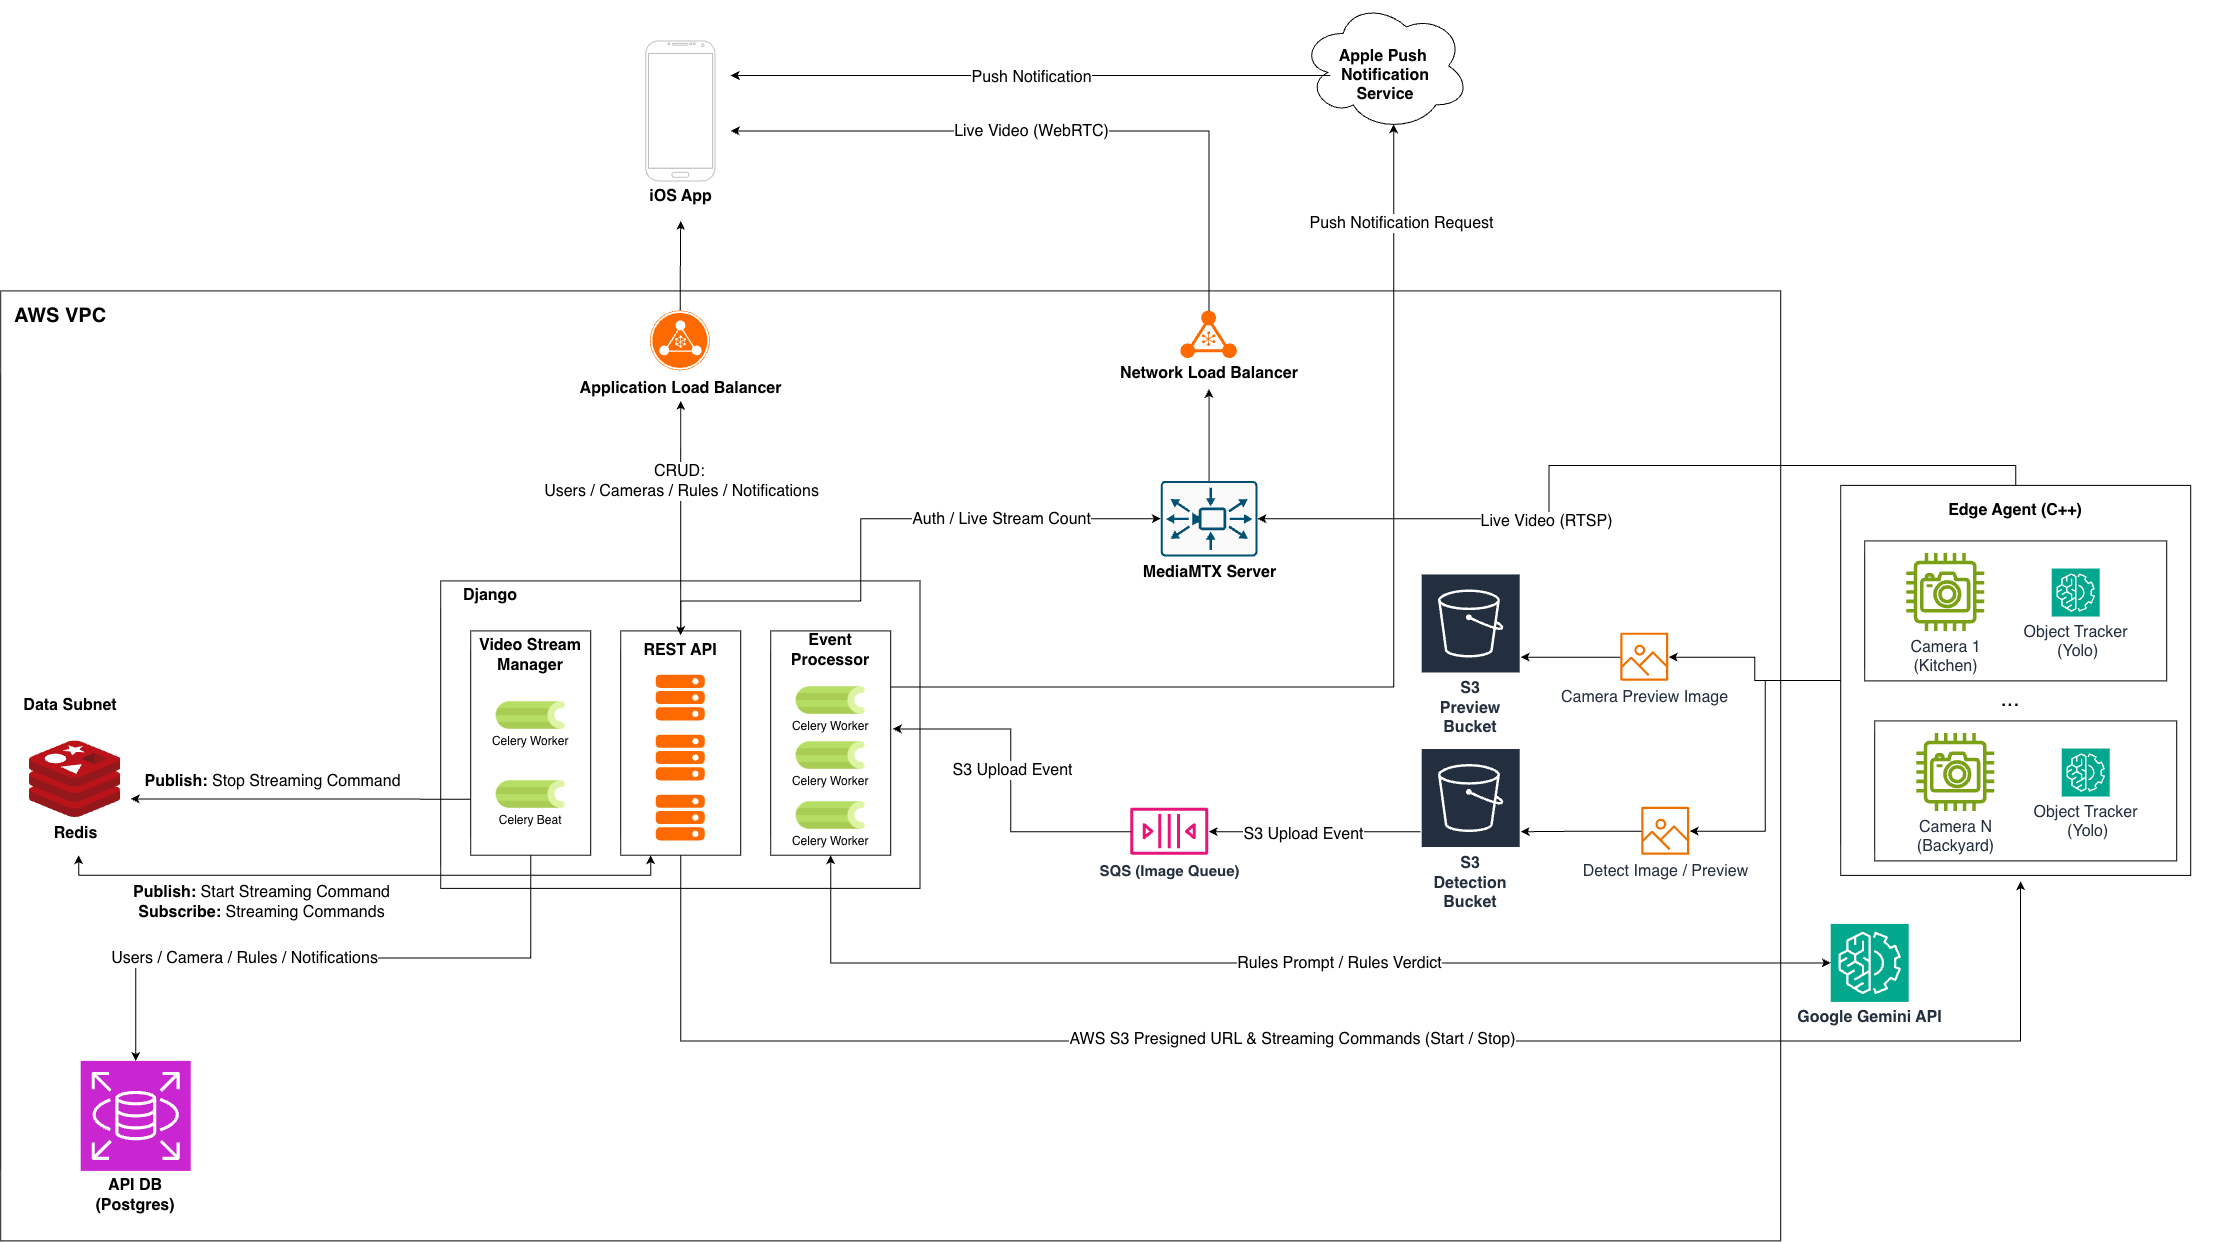
Architecture Features
ios app
- The MagPiCam iOS app consumes the MagPieCam-Core's REST API enabling users can manage rules and notifications
- Live video is streamed from the MediaMTX server using WebRTC
backend
- Django REST frameworks handles authentication and CRUD via a REST API secured with JWTs.
- Models are stored in a Postgres DB and use UUIDv7 ids as primary keys for sortable, opaque, index-friendly IDs
- The event processor consumes image detection SQS messages, and queues tasks that are picked up by Celery workers
- Celery workers evaluate images against user rules using the rules engine and triggers notifications.
- Cameras retrieve their own JWT based on a revokable device id created from the Raspberry Pi cpu serial number and a UUID
- The core services and DB's run in AWS using Fargate, RDS PostgreSQL, and ElastiCache Redis
edge agent
- Tracks objects using ByteTrack+Yolo and sends images to the backend with a per track exponential backoff
- Streams video at 30fps when a user connects to the MediaMTX server, by long polling a REST endpoint.
- Presigned S3 URLs let edge cameras upload images & video clips directly to storage (S3)
- The edge agent runs on a Raspberry Pi Zero 2w with 36% CPU utilization.
Architecture Overview
I think the most digestible way to look at the system is by looking at it feature by feature in the order that a user might encounter each feature. (Click on any image on the right to enlarge it)
Creating an Account
User account are pretty straightforward and implemented using Django's User model with the simple JWT plugin. When a user creates an account, the app receives a short lived access token and a refresh token that can be used to retrieve a new access token. All other endpoints besides the device provision ones require JWTs.
Adding a camera
Generating the Claim Token
First to create a camera in the system I create a QR code using a claim_token which is generated by the cameras/provision endpoint. The cameras/provision endpoint takes a device id (CPU serial number on the Raspberry Pi) and generates a claim_token by appending a uuid to the device id. The claim_token is then hashed using SHA-256, stored in a Camera model in Postgres along with the device id. Then the text token is returned to the caller.
Why the Claim Token Is Single-Use
This process basically simulates what would usually take place when the cameras are assembled. The claim_token can only be used once to pair a camera to a user's app. This design ensures that if the camera is stolen it can't be claimed. But before the user can claim the camera it must register with the backend at start up.
Registering the Camera
At startup, the camera calls the cameras/register endpoint passing it's device id and the claim_token. The backend core then queries the DB for the device id and compares the stored hashed claim_tokens to the hashed input claim_token. If a matching camera is found in the DB, a flag is set on the camera model and another uuid is generated and attached to the device id, creating the device_token. This token is saved to disk in the camera and is used to request JWTs going forward. This system enables the device token to be revoked in the case that the camera is lost or stolen.
Claiming the Camera
Once the camera has been registered the app can scan the QR code which calls cameras/claim and sets the claimed.
Detecting Moving Objects
The edge agent on the camera kind of operates outside of what the user does. It tracks moving objects and uploads detection images regardless of what is going on. The camera is built using a Raspberry Pi Zero 2W and the Raspberry Pi AI Camera. The AI camera is running a quantized YOLOv11n model and passes the bounding boxes to the ByteTrack tracker.
Each track has a it's own exponential backoff, so that you don't get bursts of images of the same thing uploaded to S3. I used this approach because an object may enter the view of the camera but it may take a while for it to do something that triggers a notification. For example my cat can walk into view but not eat for 30 seconds. Each time an object is detected the camera requests a short-lived (currently good for 5 minutes) presigned url from /cameras/presigned_upload in order to upload the image to S3. Using a presigned url enable the camera to upload images without permanently storing AWS credentials. The image_detection S3 bucket then enqueues a message in SQS on upload events. (I am going to write an article that goes into more depth on the camera soon)
Creating & Evaluating Rules
Adding Rules
Once a camera has been added to a user's account they can add rules for smart notifications to the camera. In the iOS app a prefix is hardcoded to give the rules a predictable structure. As it is now, all rules need to be prefixed with 'Tell me when you see:' and then the user fills in the rule. This and other constraints like structured output make the model's output more predictable. The rules model itself in Django is pretty straightforward: it stores the rule suffix, has it's own id public_rule_id that is a uuid7 like the other public ids, and has an field enabled for toggling the rule.
Evaluating Detection Images
The event processor picks up messages from SQS which have the S3 object key needed to download the image. The event processor then creates a task for Celery workers, and thats pretty much it for the event processor. It just runs in a loop consuming from SQS. One important thing it does NOT do is mark the message as delivered. That is done by the celery worker so that if something goes wrong (Gemini API is down etc.) the message can be delivered again. The celery worker then downloads the image from S3, builds a prompt from the user's rules and then runs inference either using the rules model.
Prompting
The full prompt is composed of: System Instructions SYSTEM_INSTRUCTIONS = 'You evaluate whether a condition is present in a security camera image. Answer only from what is visibly present. If the image is too dark, blurry, or ambiguous to tell, answer 'unsure' rather than guessing.' Currently I am using gemma4-e2b-it as the hosted model in dev (more on this below) and I noticed that it tends to trigger false alerts in darker images. So the goal of the system prompt is to make the model lean toward false negatives over false positives. This idea here is, even though the instructions say the camera is a security camera, the use cases for the camera broader than security camera. For example going forward the plan is to add analytics so you can see how many events triggered for a rule and how often. So the idea is to focus on highly valuable notifications. Rules Preamble RULES_PREAMBLE = 'For each condition below, answer whether it is visible in the image.' Rules list The rules are then combined with the prefix 'Is there' because as seen above the format of the rules in the database is: * a person eating * a blue car in the driveway * a cat on the counter Each rule is then listed with it's public_rule_id, so the full rules list would look like: '01a01b0f-2cf3-7110-8f89-9c59f02d2c51:Is there a person eating.
01a01b0f-2cf3-7110-8f89-9c59f02d2c52:Is there a car in the driveway.
01a01b0f-2cf3-7110-8f89-9c59f02d2c53:Is there a cat on the counter.'
Structuring the rules like this enables the model to evaluate all the rules in a single prompt or inference run. This reduces the number of api calls made to the Gemini API in production. It also means the system instructions, preamble are only included once as opposed to multiple times if calling the API for each rule, which means less tokens, and less money spent. When using the Gemini API the prompt end here because it can force the model to adhere to a json schema using structured outputs. So I created a pydantic model for the output and pass that to the Gemini API. When hosting the model myself I am currently using a json response prompt along with some post-processing like removing a json code fence (```json) for example: JSON_RESPONSE_INSTRUCTIONS =
'Reply with JSON and nothing else. No prose, no explanation, no code fences. Use exactly this shape: {"verdicts": [{"id": " But the plan is to use lm-format-enforcer to actually force the output to adhere to the pydantic model. Speaking of the pydantic model, it mirrors the input but has a verdict (yes/no/unsure) for each public_rule_id: {
'01a01b0f-2cf3-7110-8f89-9c59f02d2c51':'yes'
'01a01b0f-2cf3-7110-8f89-9c59f02d2c52':'no'
'01a01b0f-2cf3-7110-8f89-9c59f02d2c53':'unsure'
}
See prompt.py for reference. If a verdict is yes, a push notification is sent for the whole bundle along with a link to a preview image.
Streaming Live Video
Starting 🎬
I was surprised when developing this feature because at first, I thought streaming the video would be the most challenging part to build. But instead, starting and stopping streaming on-demand was actually the trickiest part. The camera always initiates connections with the backend because it sits in the user's wifi network. So I needed some way for the camera to know when to start / stop streaming. Otherwise, if the camera were streaming all the time that would waste bandwidth and compute. So I used long polling. Here is how it works from opposite ends. The Camera The camera long polls the cameras/streaming/command/ end point for 30 seconds at a time. If the command returned is none, or the camera is streaming and the command is start, the camera just calls the endpoint again. If the start command is received that camera starts a new process that consumes frame bytes from a buffer and feeds them to FFMPEG. FFMPEG then streams the frames to the MediaMTX server using RTSP including a JWT in the request. In the background the camera continues to long poll for new commands. If the stop command is received it signals the streamer process to end, and goes back to polling. The iOS App When the user clicks on the live video view the iOS app starts by calling the cameras/uuid:public_camera_id/streaming/start/ endpoint to signal the backend to publish a start command for the camera. Next the app starts reading the video stream from the MediaMTX via WebRTC / WHEP using a JWT for authentication. MediaMTX passes the token to the cameras/mediamtx/auth/ in order to authenticate the stream. If the backend returns 200 OK then MediaMTX starts the stream.
Stopping 🛑
To stop a video stream, the system uses Celery Beat to periodically run tasks that check the active streams. For each stream with an active publisher it checks if there are any readers for that stream. If there are no readers then it publishes the stop command, otherwise it does nothing. The channel subscriber then gets that message and the camera returns from long polling with the stop command. Once the camera returns from the long poll with the stop command it ends the RTSP stream.
My Workflow with Claude

When I started this project, I wanted to solve a problem and learn about AI Engineering by building a backend system that used an AI model as if it were in production. However, I wanted to build the backend in the context of a fully working system. If I built just the backend, it would be very hard to conceptualize some of the interesting problems that I encountered while connecting the iOS app to the edge device, like the streaming lifecycle for example. So I wrote most the MagPieCam-Core services myself and delegated the a lot of the iOS app development and the edge agent development to Claude Code. When designing the system, I would come up with a design myself and have Claude play systems architect and review the design for anything I was missing or help me understand how engineering teams typically solve the problem.
Takeaway: I used to be very skeptical about delegating work to agents like Claude Code, but it really accelerated the development of this project. So far I have noticed that most mistakes come from miscommunications, so I try to be as specific as possible when working with Claude even if I don't know how to do what I want. Developing the app is a great case study of this. I started by learning Swift using Stanford's cs193p course. Then I started building the app. At first I built the views myself, but I am new to UI design and as views got more complex it was taking too much of my time. Swift has a vast library of tools for building views, so to save time I focused learning from other UIs so I could describe what I want and let Claude focus on how to implement that using best practices.